

GitHub Actions as CI/CD for a site using a static generator and GitHub Pages
A historical walkthrough of using GitHub Actions to generate a Pelican website from a private repository and push the output to GitHub Pages, with Telegram notifications.
Translated by ChatGPT GPT-6.1 Sol

Original publication details
GitHub Actions как CI/CD для сайта на статическом генераторе и GitHub Pages
Archived publication. Roles, figures, and technical instructions reflect the original publication date.

After browsing Habr a little, I was surprised by how few articles had been published about GitHub’s (beta) feature, Actions.
You might explain that lack of coverage by saying the functionality is still being tested, even if it is in “beta.” But a useful feature of the beta is precisely that it lets you use this tool in private repositories. In this article, I will explain how to work with this technology.
Background
Starting from the beginning, I should probably mention that, while looking for a quick, convenient, lightweight, and free way to host a personal “About me” website, I spent several nights going through a great many articles.
Some choose hosting, others a cloud server. Those who do not want to figure out how all that works, interacts, and gets paid for tend to like uploading static websites to a repository. Fortunately, this can now be done on both GitHub and GitLab.
Of course, it is everyone’s personal choice.
My final choice was GitHub Pages.
About Pages
For those unfamiliar with it, gh-pages is a way to host documentation as a website, provided free of charge. Alongside documentation, it also offers hosting for personal websites. GitHub provides this functionality to all users, and it is available in repository settings.
For a project repository, the gh-pages branch is used; for a user website, a separate repository named username.github.io, with the website’s sources in the master branch.
You can read more in the documentation, but I will simply note that GitHub, with surprising generosity, lets everyone attach their own domain to such a site by adding a CNAME file containing the domain name and pointing their domain provider’s DNS to GitHub’s servers.
I am sure there are plenty of articles here on deploying such a site, so that is not what follows.
How the problem arose
The problem was that using a static generator requires writing additional kludges scripts and using libraries to simplify generating pages and uploading them to a repository. Put simply, if you keep the sources in a separate private repository, every change to the site requires setting up a local environment to generate static pages and publish them to the main website repository.
There are plenty of static generators, and they all have the same problem. These actions take too much time and effort and ultimately stall work on the site, especially after several migrations between operating systems or incidents involving lost hard-drive data—(as happened in my case).
Just recently, either in a pop-up notification on the website or in an email from GitHub, I noticed a newly integrated CI/CD feature that made it possible to carry out these actions with minimal effort.
About static page generators
I will not dwell on this subsection, but I will share a couple of points I arrived at while choosing and using them:
-
Choose a generator in your own programming language, or one you understand as well as possible. I came to this idea when I had to add functionality for the site myself and put in workarounds to improve its stability and automation. It is also a good reason to write additional functionality yourself as plugins;
-
Which generator to settle on is a personal choice, but bear in mind that, for an initial introduction to GitHub Pages functionality, you first need to install Jekyll. Fortunately, it lets you generate a site from sources directly in the repository—(which I will replicate with my choice).
My choice of generator is based on the first point. Pelican, written in Python, easily replaced Jekyll, which was unfamiliar territory for me—(I used it for almost a year). As a result, even creating and editing articles and working on the site provides additional experience in a language I find interesting.
__
Defining the task
The main task is to write a script—actually a configuration file—that would automatically generate static pages from a private repository. The solution will use a virtual environment’s capabilities. The script itself will add the completed pages to a public repository.
Tools for the solution
The tools we will use to solve the task:
-
GitHub Actions;
-
Python 3.7;
-
Pelican;
-
Git;
-
GitHub Pages.
Solving the problem
After getting somewhat acquainted with the documentation and figuring out how Actions scripts are written, it became clear that this mechanism would completely solve the problem. At the time of writing, using this functionality requires signing up for beta testing!


GitHub’s own description of the new functionality
Writing an Actions script starts with creating a named file in the .github folder and its workflows subfolder. You can do this manually or in the editor in the Actions tab on the repository page.
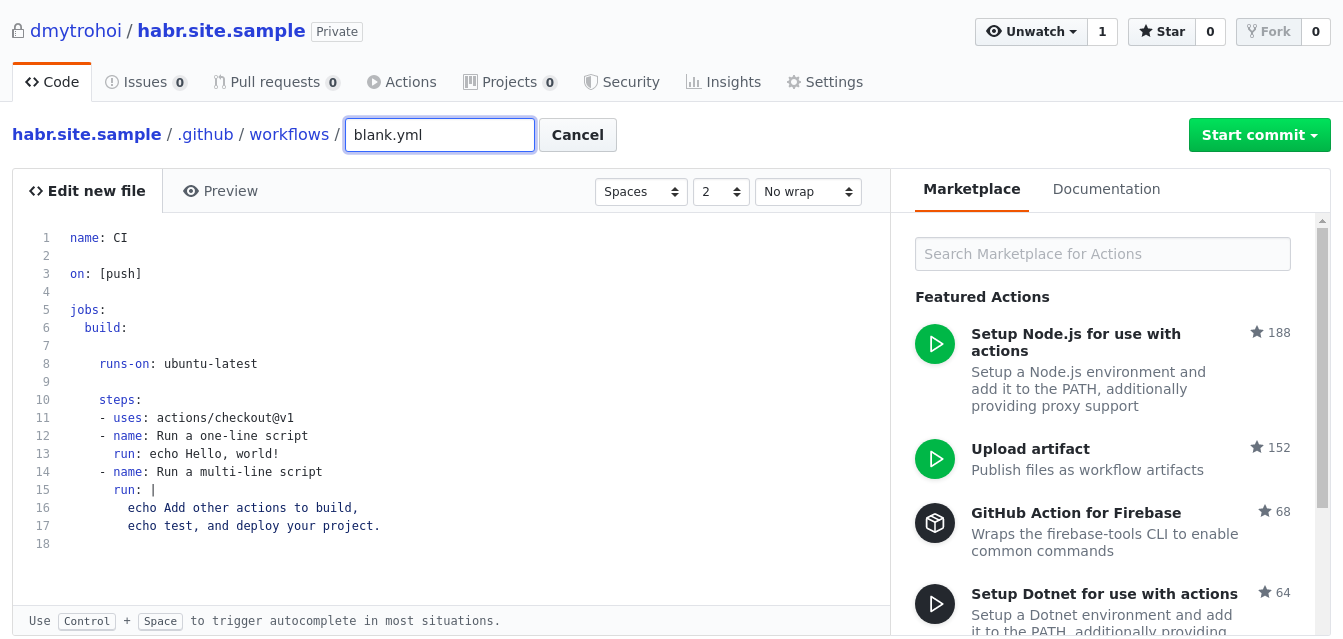
An example of a blank script template
Brief comments on the template
name: CI    # название скрипта: будет отображаться во вкладке Actions

on: [push]  # действие, по которому запускается данный скрипт

jobs:       # роботы, которые будут выполняться
  build:    # сборка, которая..

    runs-on: ubuntu-latest      # ..будет запущена на основе этого образа

    steps:              # шаги которые будут проделаны после запуска образа
    - uses: actions/checkout@v1     # переход в самую актуальную ветку
    - name: Run a one-line script   # имя работы номер 1
      run: echo Hello, world!       # суть работы номер 1 (bash-команда записана в одну строку)
    - name: Run a multi-line script   # имя работы номер 2
      run: |                    # суть работы номер 2 (многострочная)
        echo Add other actions to build,
        echo test, and deploy your project.
Let’s write our own based on the template:
-
You can leave the name as “CI.” It is a matter of taste.
-
Next, choose the action or trigger that will launch the script. In our case, this is simply pushing a new commit to the repository.
on:
push- We will also keep the image on which the script runs from the example, since Ubuntu fully satisfies our functional needs. Looking at the available tools, it becomes clear that this can be any image we need or simply find convenient, or a Docker container based on it.
  build:
runs-on: ubuntu-latest- In the steps, we first configure the environment in preparation for the main work.
3.1) Switch to the branch we need—the standard checkout step:
- uses: actions/checkout@v13.2) Install Python:
    - name: Set up Python
      uses: actions/setup-python@v1
      with:
        python-version: 3.7
3.3) Install our generator’s dependencies:
    - name: Install dependencies
      run: |
          python -m pip install --upgrade pip
          pip install -r requirements.txt
3.4) Create the directory where the website pages will be generated:
   - name: Make output folder
run: mkdir output- To make work on the site continuous—without deleting previous changes and while allowing changes to be added to the website repository without conflicts—the next step will clone the website repository each time:
   - name: Clone master branch
      run: git clone "https://${{ secrets.ACCESS_TOKEN }}@github.com/${GITHUB_ACTOR}/${GITHUB_ACTOR}.github.io.git" --branch master --single-branch ./output
This step uses system variables:
-
GitHub sets
GITHUB_ACTORitself; it is the username of the person responsible for triggering the script; -
secrets.ACCESS_TOKENis a generated token for managing GitHub. We can pass it as an environment variable by setting it in theSecretstab of our repository settings. Please note that when generated, the token is shown to us only once; it will not be accessible again. The same applies to the values in Secrets.
- Move on to generating our pages:
   - name: Generate static pages
      run: pelican content -o output -s publishconf.py
The parameters passed to the generator specify the directory where generated files will go (-o output) and the configuration file used for generation (-s publishconf.py; you can read about separating local configuration from publication configuration in the Pelican documentation).
Remember, we have already cloned the website repository into the output folder.
- Configure git and stage our modified files:
    - name: Set git config and add changes
      run: |
          git config --global user.email "${GITHUB_ACTOR}@https://users.noreply.github.com/"
          git config --global user.name "${GITHUB_ACTOR}"
          git add --all
      working-directory: ./output
This step uses the variable we already know and specifies the working directory in which its commands will run. Otherwise, the command for switching to that directory would look like cd output.
- Generate a commit message, commit the changes, and push them to the repository. To avoid an empty commit, and therefore a bash error—a result other than
0—we first check whether there is anything to commit and push at all. For this, we usegit diff-index --quiet --cached HEAD --, which returns0in the terminal if there are no changes compared with the previous version of the website, and1if there are changes. We then handle that command’s result. This way, we record useful information about the site’s state at this stage in the script’s execution information, instead of automatically failing and sending us a failure report.
We also carry out these actions in our directory containing the completed pages.
   - name: Push and send notification
      run: |
          COMMIT_MESSAGE="Update pages on $(date +'%Y-%m-%d %H:%M:%S')"
          git diff-index --quiet --cached HEAD -- && echo "No changes!" && exit 0 || echo $COMMIT_MESSAGE
          # Only if repo have changes
          git commit -m "${COMMIT_MESSAGE}"
          git push https://${{ secrets.ACCESS_TOKEN }}@github.com/${GITHUB_ACTOR}/${GITHUB_ACTOR}.github.io.git master
      working-directory: ./output
The result
Ultimately, this script lets you stop thinking about generating static pages. Add changes directly to the private repository, whether by working with git on any system or creating a file through GitHub’s web interface, and Actions will do everything themselves. If the script fails unexpectedly, an email notification will arrive.
Full code
Here is my working version. Its final step adds a notification that the commit has been pushed to the main repository.
It uses the Secrets described above, with the bot token and the identifier of the user who should receive the message added.
name: Push content to the user's GitHub pages repository

on:
  push

jobs:
  build:
    runs-on: ubuntu-latest

    steps:
    - uses: actions/checkout@v1
    - name: Set up Python
      uses: actions/setup-python@v1
      with:
        python-version: 3.7
    - name: Install dependencies
      run: |
          python -m pip install --upgrade pip
          pip install -r requirements.txt
    - name: Make output folder
      run: mkdir output
    - name: Clone master branch
      run: git clone "https://${{ secrets.ACCESS_TOKEN }}@github.com/${GITHUB_ACTOR}/${GITHUB_ACTOR}.github.io.git" --branch master --single-branch ./output
    - name: Generate static pages
      run: pelican content -o output -s publishconf.py
    - name: Set git config and add changes
      run: |
          git config --global user.email "${GITHUB_ACTOR}@https://users.noreply.github.com/"
          git config --global user.name "${GITHUB_ACTOR}"
          git add --all
      working-directory: ./output
    - name: Push and send notification
      run: |
          COMMIT_MESSAGE="Update pages on $(date +'%Y-%m-%d %H:%M:%S')"
          git diff-index --quiet --cached HEAD -- && echo "No changes!" && exit 0 || echo $COMMIT_MESSAGE
          git commit -m "${COMMIT_MESSAGE}"
          git push https://${{ secrets.ACCESS_TOKEN }}@github.com/${GITHUB_ACTOR}/${GITHUB_ACTOR}.github.io.git master
          curl "https://api.telegram.org/bot${{ secrets.BOT_TOKEN }}/sendMessage?text=$COMMIT_MESSAGE %0ALook at ${GITHUB_ACTOR}.github.io %0ARepository%3A github.com/${GITHUB_ACTOR}/${GITHUB_ACTOR}.github.io&chat_id=${{ secrets.ADMIN_ID }}"
      working-directory: ./output
Screenshots
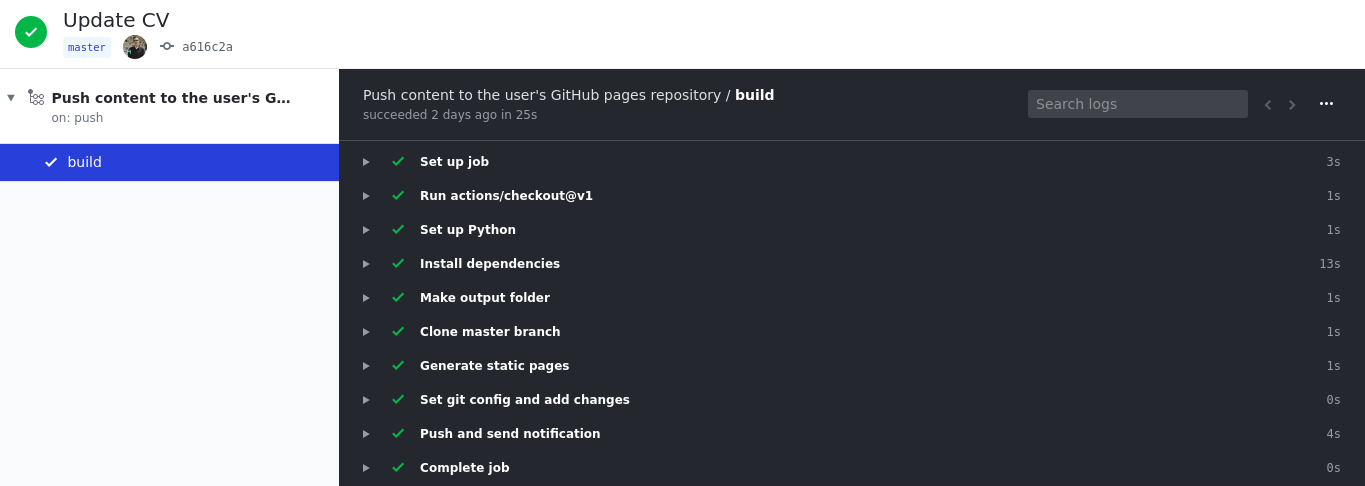
The result of one run, displayed in the Actions tab of the source repository
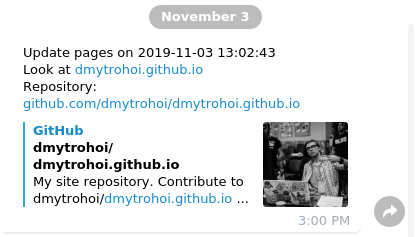
A message from the bot about the script’s completion
Useful links
General information about Actions
Actions syntax
List of triggers
Virtual environment options
GitHub Pages
Static Generator list