

A lightweight URL shortener with JavaScript, Cloudflare Workers, and a Telegram bot
A walkthrough of building a personal URL shortener using Cloudflare Workers and KV, with a Telegram bot for adding links. It preserves the original implementation and historical service limits.
Translated by ChatGPT GPT-6.1 Sol

Original publication details
Легкий сокращатель ссылок на JavaScript, Cloudflare Workers и c Telegram Bot'ом
Archived publication. Roles, figures, and technical instructions reflect the original publication date.
What do you do if you need to create a short link quickly? Use a URL shortener, of course. But what if you also want that link to be readable? And to use your own domain? Better still, without any additional servers. It looks like there is an answer.
Background
The idea for a “lightweight URL shortener” came to me while looking for a way to redirect through a domain to a room in the trendy new social network Clubhouse. The idea behind redirecting to a room was to restart it with the same name while maintaining a continuous online presence. The problem to solve was the room’s constantly changing address, by attaching that link to a subdomain.
The solution suggested itself, since the site was already on Cloudflare. Initially, I used the “Page Rules” feature, which allows you to set redirect rules, among other things. Soon, though, I had the idea of making this redirect more flexible and changeable without having to open the service’s settings. Naturally, a Telegram bot became that solution.
Defining the task
To carry out the idea, we need to solve a few problems:
-
How do we redirect from a particular subdomain?
-
Where do we store links as key (short name)–value (redirect destination) pairs?
-
What do we use to create those short names?
As you have probably guessed, the answers are in the article’s title. So let’s move on to the practical part.
Prerequisites
For a more detailed description, I will list the main conditions needed to implement our project:
-
A domain connected to Cloudflare;
-
General knowledge of JavaScript;
-
A Telegram bot you have created;
-
Documentation for Cloudflare Workers and the Telegram Bot API.
This article does not cover how to meet these prerequisites. Solving those tasks is left to the reader.
Preparation
All the prerequisites seem to be met—“What more preparation could there be?” Let me outline a few steps to prepare for implementation:
1. Create storage—Cloudflare KV** will help us.**
Cloudflare KV is a key–value database for Workers. As you can see, Cloudflare itself solves the second problem.
The sequence is simple: on our Workers page, open the KV tab, enter the name you want for the storage, and click Add.
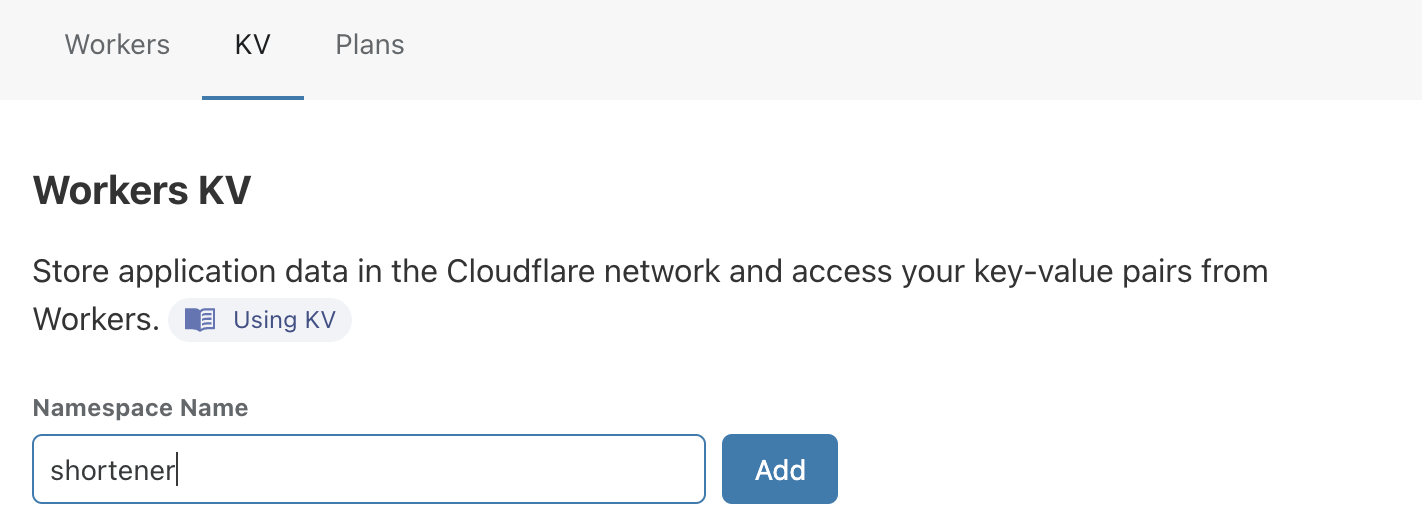
The Cloudflare KV page
Afterward, we can even look inside our storage. Unsurprisingly, there is nothing there, but we can upload the short names we want directly. This can be useful for getting started with them—for example, to test the redirects first.
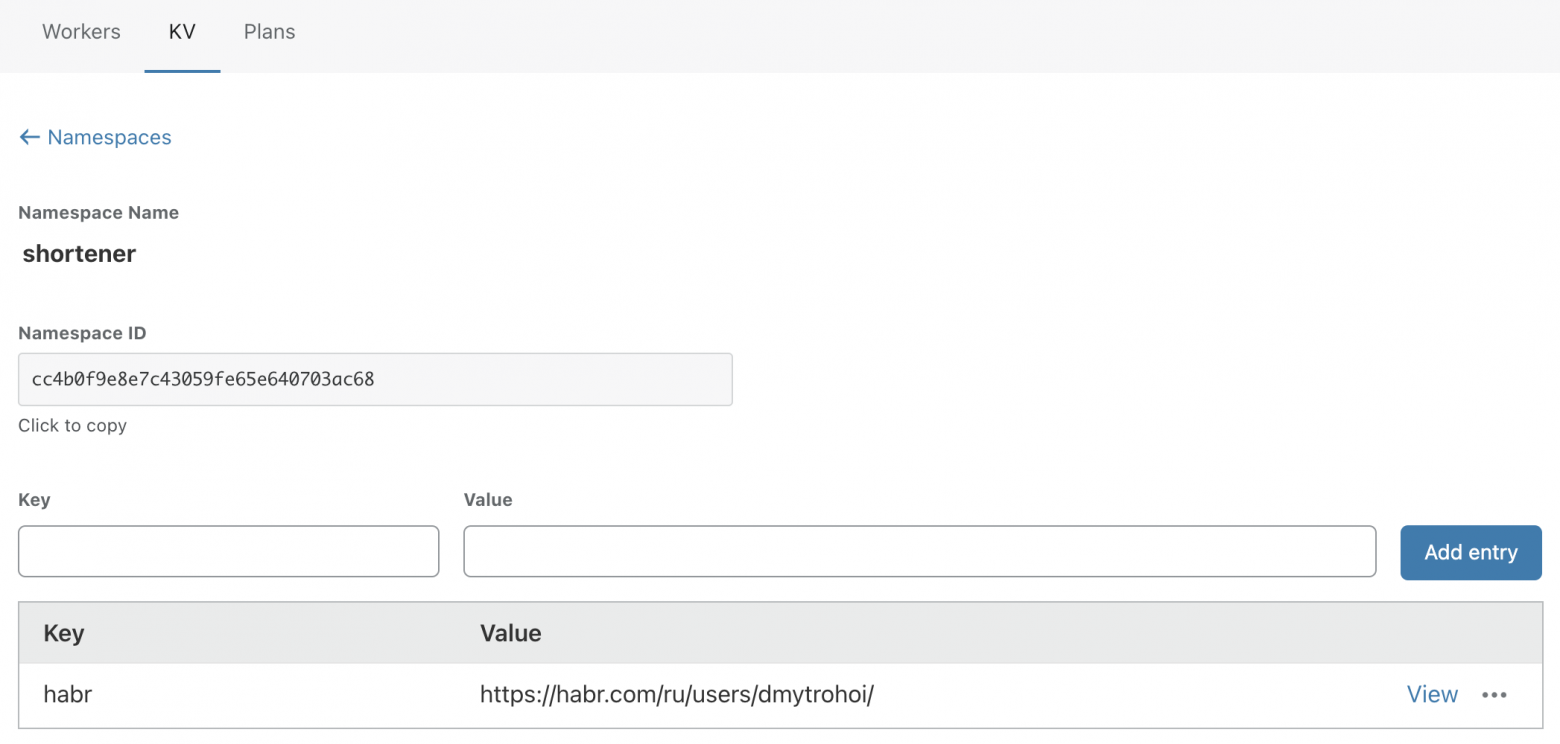
Inside our storage
2. Create and configure our Worker.
Use the “Create worker” button, immediately save and deploy the new Worker in the editor (“Save and Deploy”), then return to the menu.
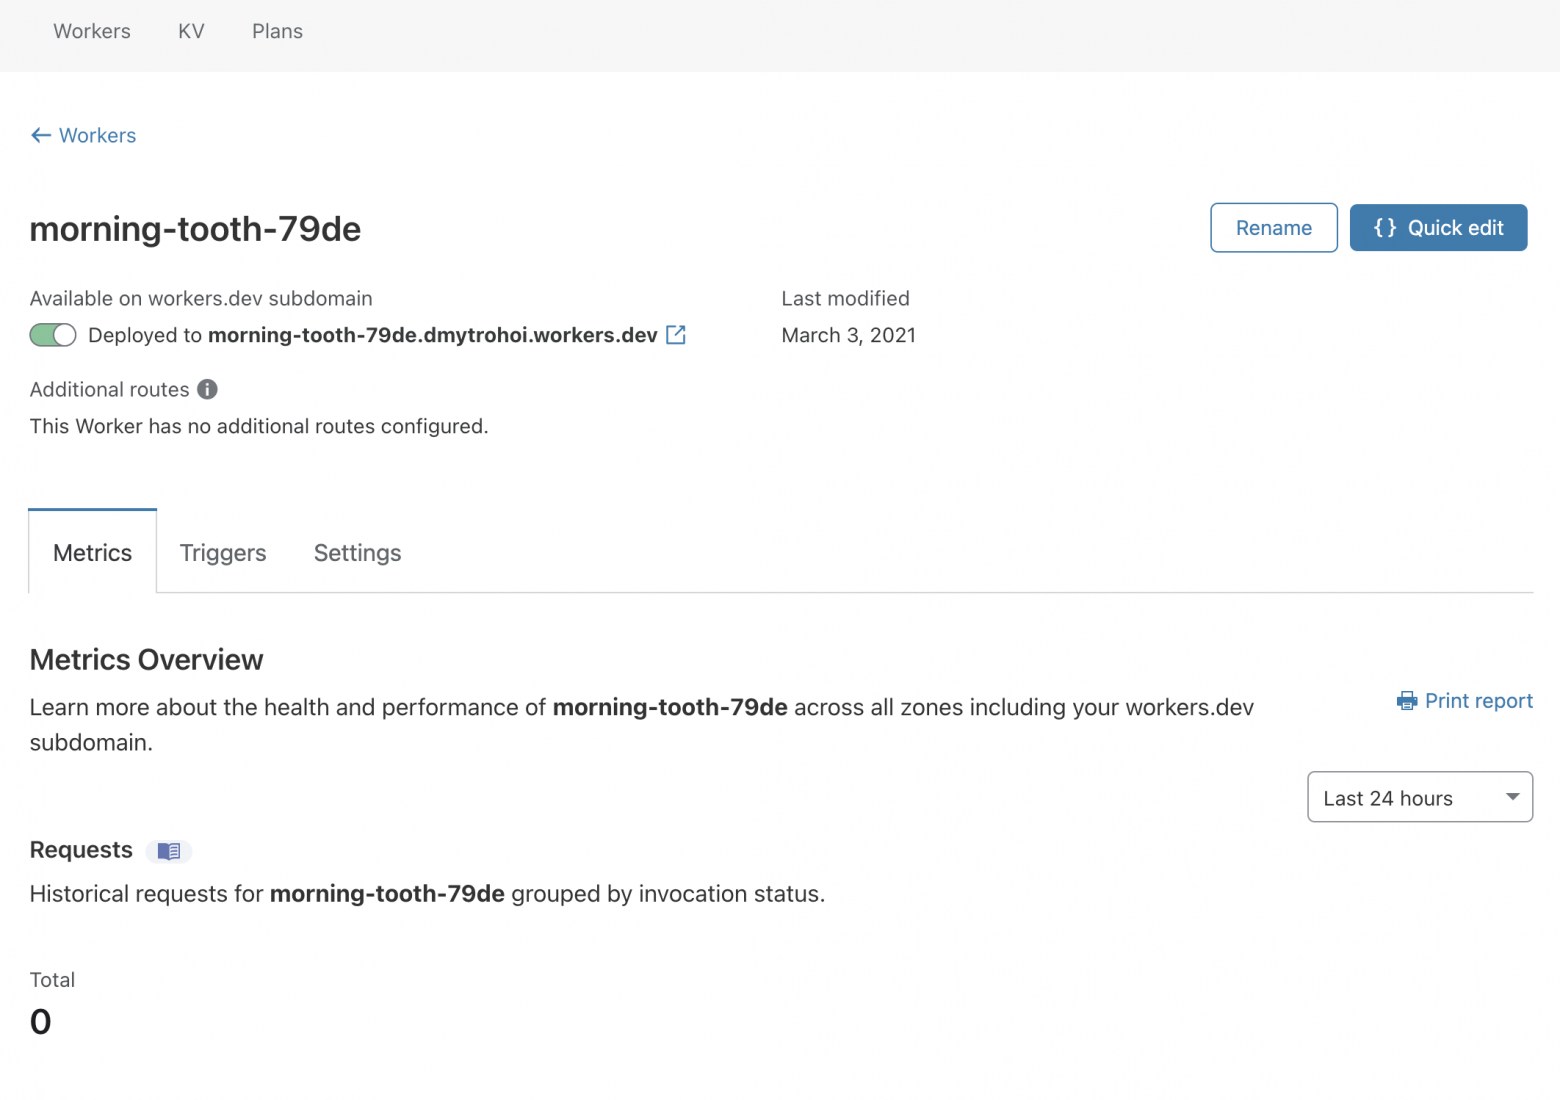
This is what the new Worker’s page looks like
Give it a sensible name right away, then open “Settings” to enter our Telegram bot’s token and bind the storage.
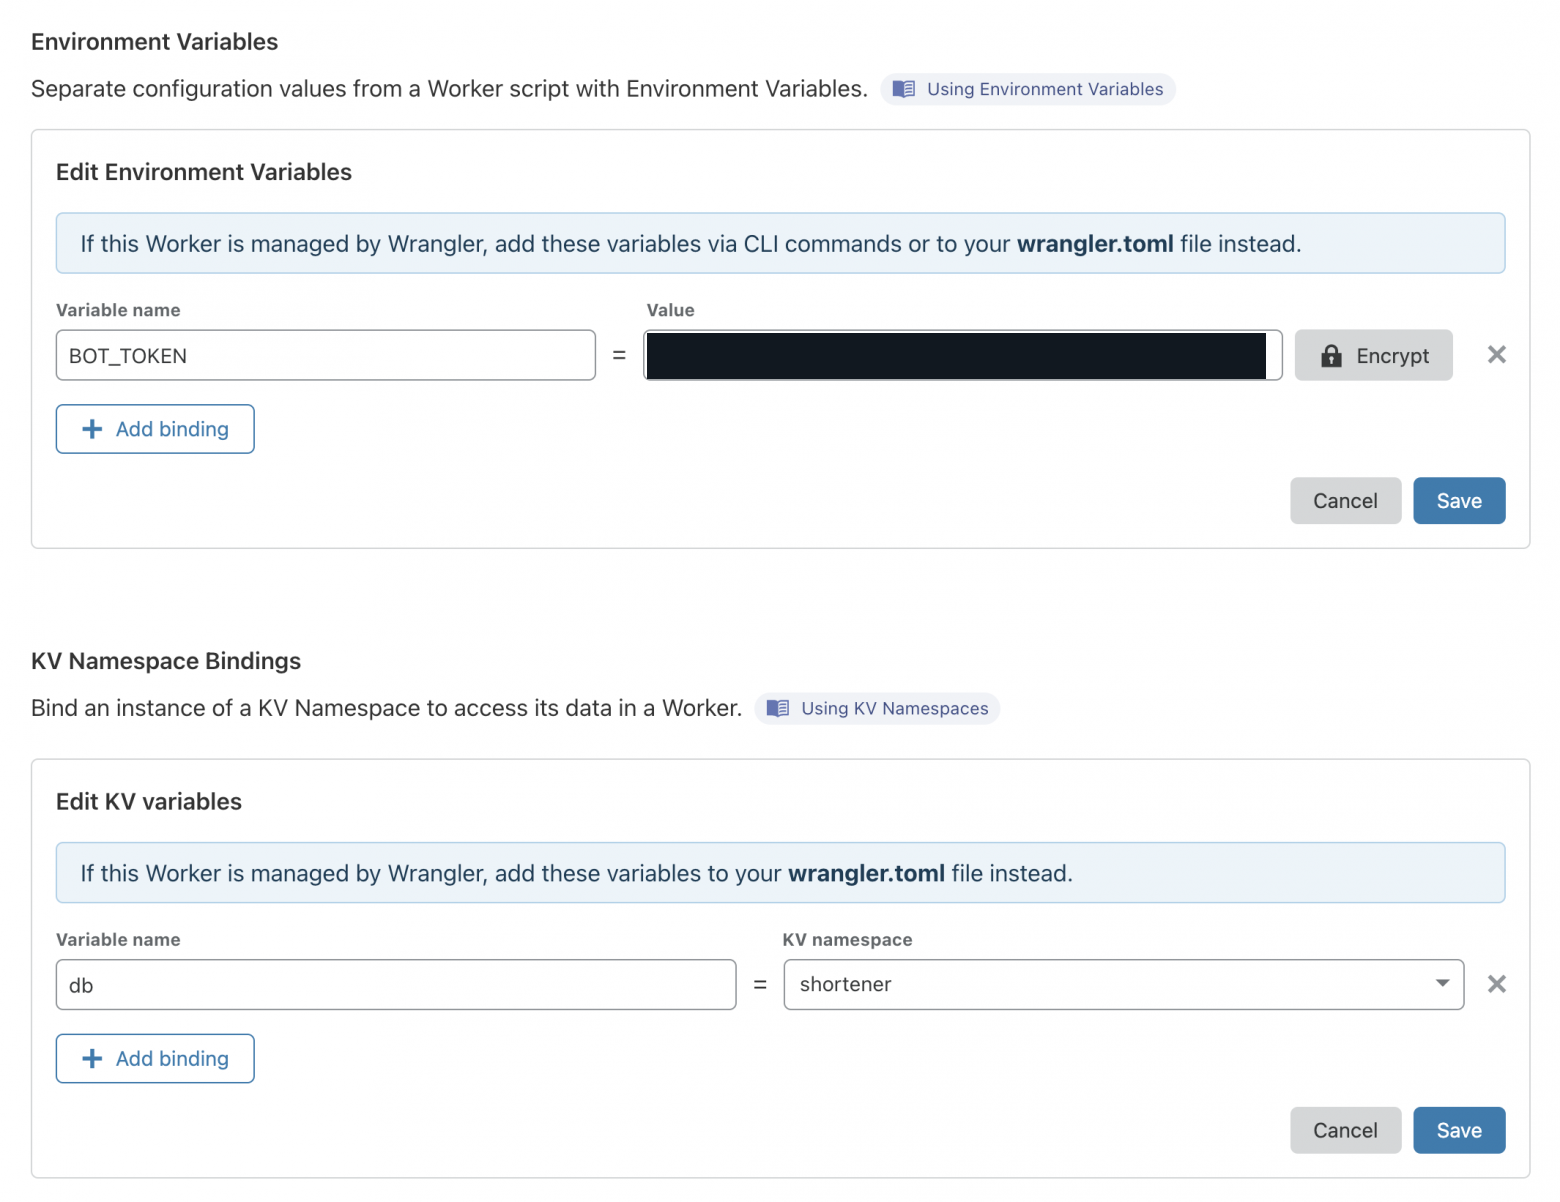
Sensitive value redacted in this archived illustration.
Worker settings
3. Bind the subdomain to the script
To make requests to the desired address—in my case, url.mydomain.com—send the user to our future “URL-shortening service,” we will configure a subdomain binding.
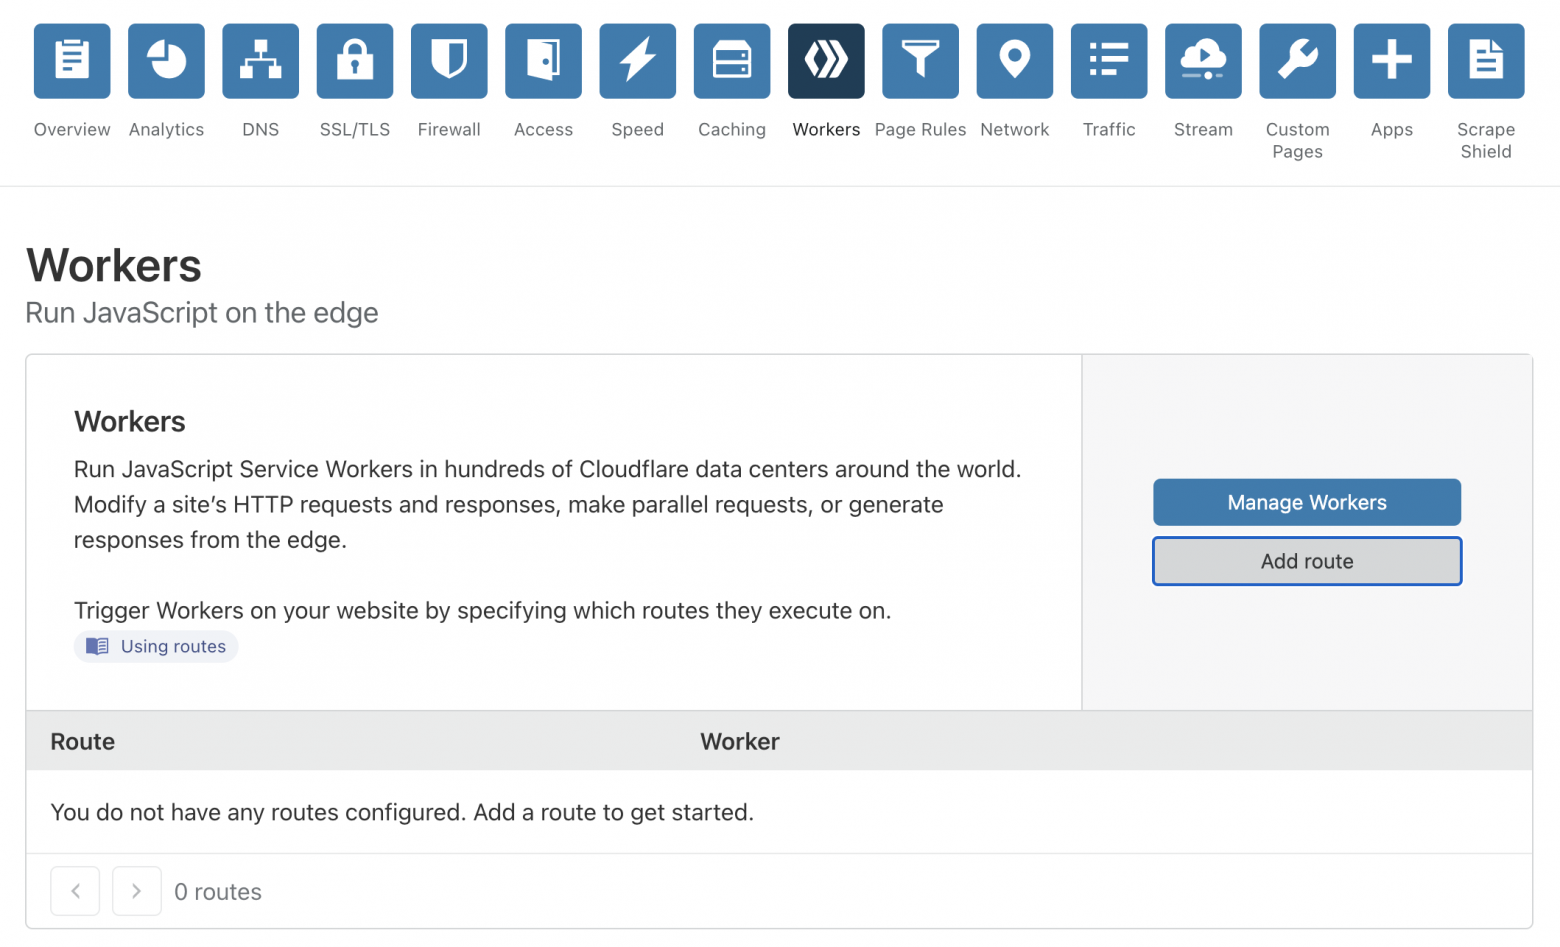
The Workers page for our domain
Specifically, on our domain’s “Workers” page, we need to add a “Route” to the future shortening service.
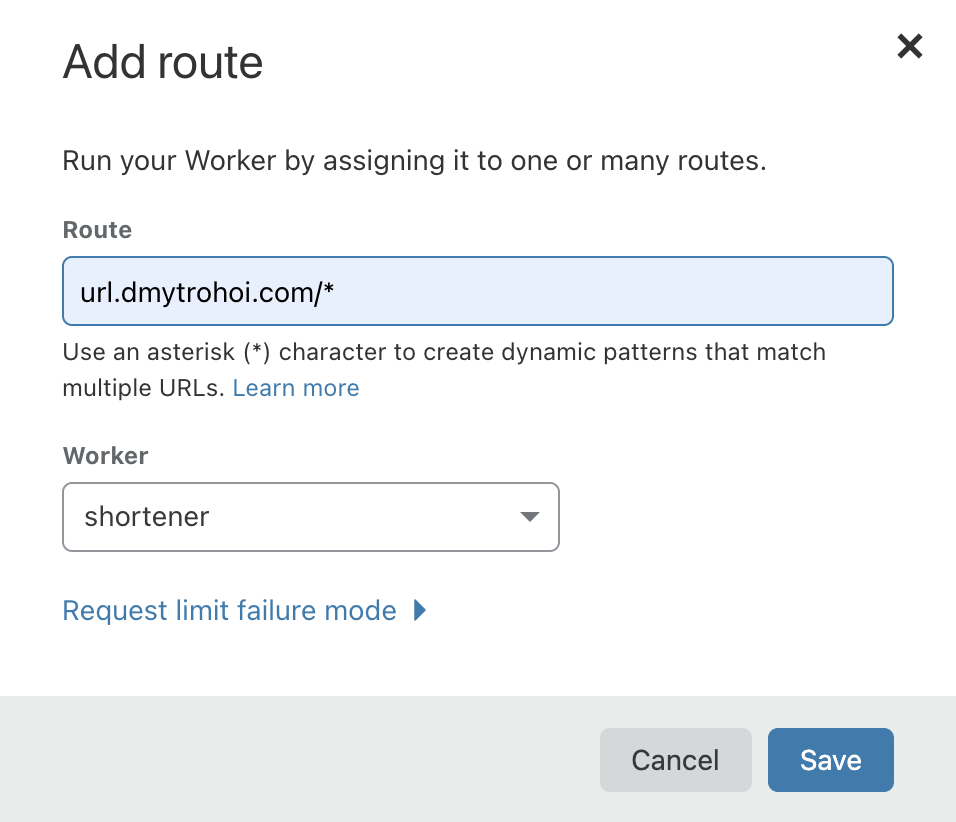
Adding a new redirect
Notice that the asterisk at the end of the link means that anything after our domain—the path—will be directed to the shortener.
This is important for everything to work later.
Accordingly, we also create a DNS record so that all requests pass the DNS check.

The new DNS record where the URL shortener will be located
Done! We can start coding.
Implementation
Let’s begin the actual implementation. The next steps take place in the code editor Cloudflare provides. We have already seen it before initializing the new Worker. Return to it using the “Quick edit” button on our project’s page.
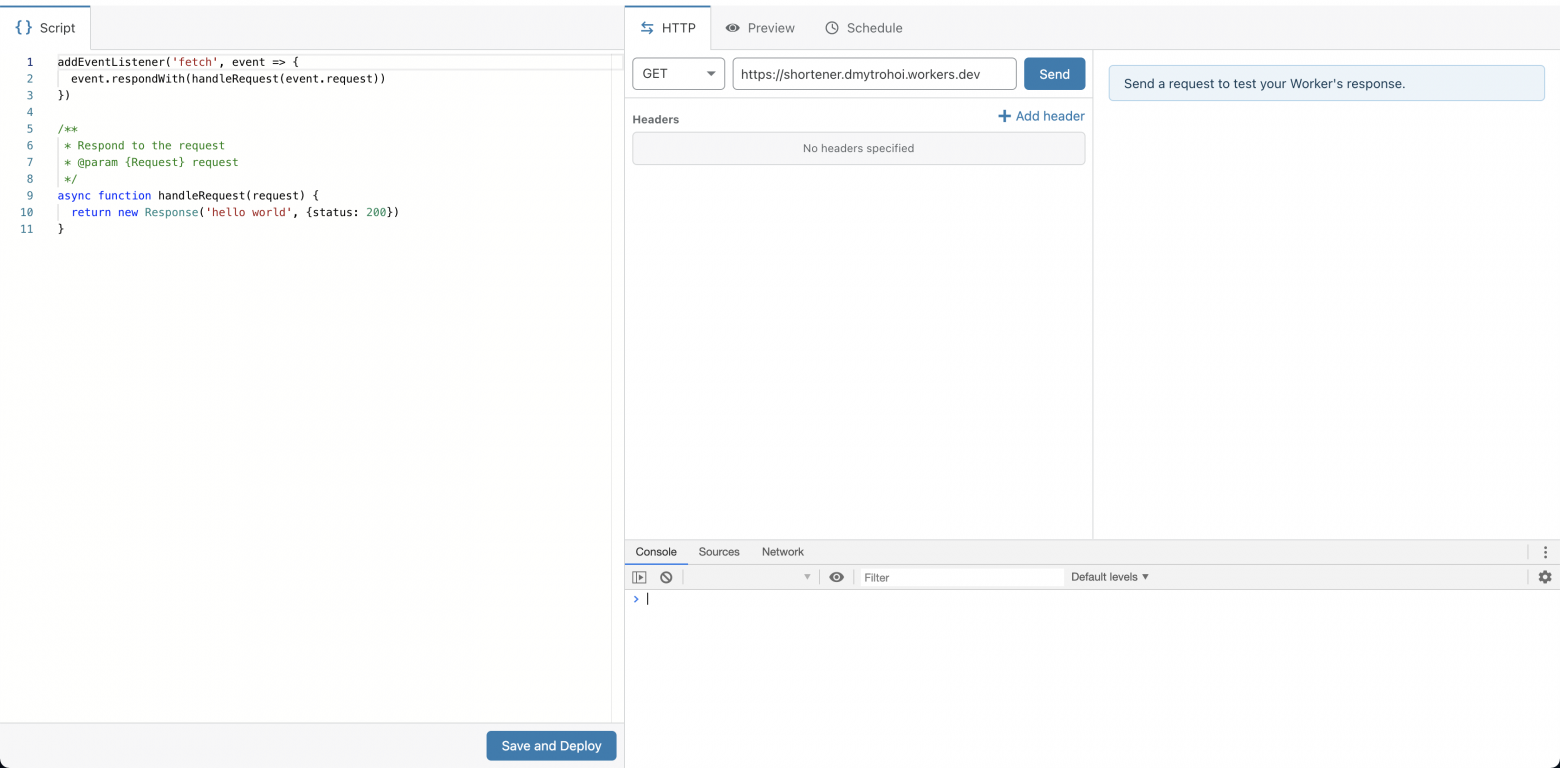
The code editor
Our service will consist of two parts:
-
Redirecting
-
Saving a new short name
To implement redirects, we will write a function that retrieves a value from our database and creates a redirect if it finds the path we entered (the URL path). Otherwise, we will return a 404 error.
addEventListener('fetch', event => {
  event.respondWith(handleRequest(event.request))
})

/**
 * Respond to the request
 * @param {Request} request
 */
async function handleRequest(request) {
  const requestUrl = new URL(request.url);
  const path = requestUrl.pathname.substring(1); // Удалим символ "/"
  return await redirect(path)
}

/**
 * Make redirect
 * @param {string} shortName
 */
async function redirect(shortName) {
  // Получим значение адреса который запросили по короткой ссылке
  const url = await db.get(shortName);
  if (url) {
    // Переадресовываем по ссылке
    return Response.redirect(url)
  }
  // Не нашли такого сокращения
  return new Response(null, {status: 404})
}
Right here, in the editor’s right-hand pane, which lets us debug code that has not yet been deployed, we check that the redirect works:
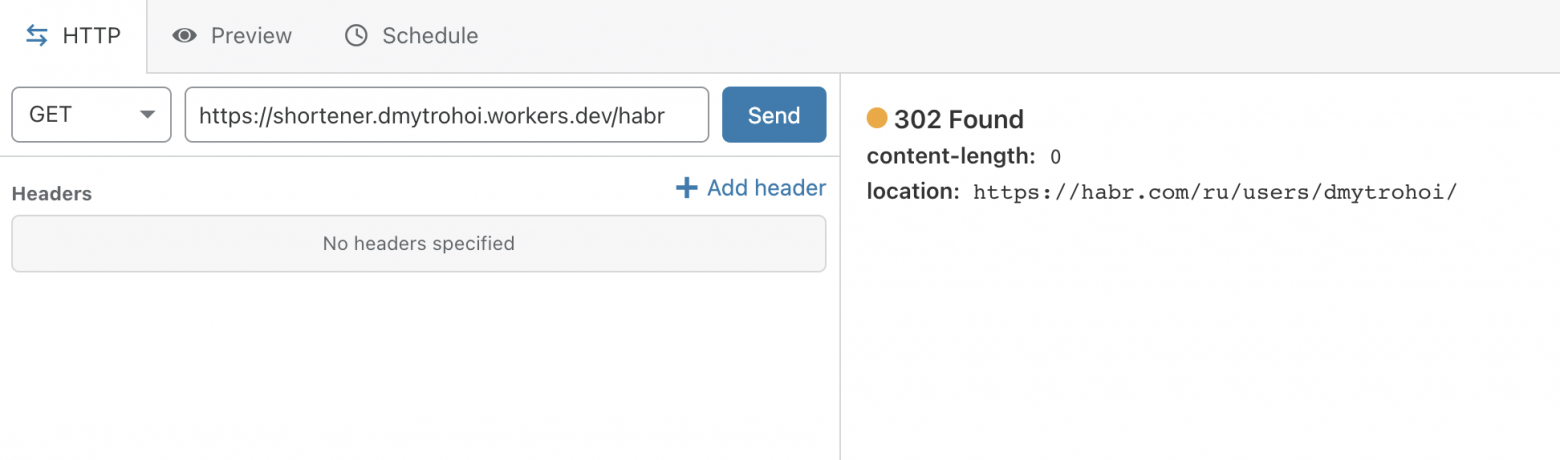
We have contact!
Now let’s implement the second part. This task is more substantial. First, we will determine that Telegram has contacted us through the URL we specified. Next, we will check that we are the ones who messaged the bot: to prevent anyone else from accessing it, we will put our Telegram User ID in a constant. Then we will extract the short path and redirect destination from the message and save the link to the database. Finally, we will connect our bot through webhooks.
addEventListener('fetch', event => {
  event.respondWith(handleRequest(event.request))
})

const ADMIN = 11111111; // Типо наш Telegram User ID

/**
 * Respond to the request
 * @param {Request} request
 */
async function handleRequest(request) {
  const requestUrl = new URL(request.url);
  const path = requestUrl.pathname.substring(1);
  // Добавили проверку пути на соответствие токену нашего бота
  if (path == BOT_TOKEN) {
    return await bot(await request.json())
  }

  return await redirect(path)
}

/**
 * Make redirect
 * @param {string} shortName
 */
async function redirect(shortName) {
  const url = await db.get(shortName);
  if (url) {
    return Response.redirect(url)
  }
  return new Response(null, {status: 404})
}

/**
 * Create new shorten URL
 * @param {Object} update
 */
async function bot(update) {
  // Пропускаем сообщения от НЕ админов
  if (update.message.from.id != ADMIN) {
    return new Response("OK", {status: 200})
  }
  // Разбиваем сообщения типа "shortname url"
  const [shortName, url] = update.message.text.split(" ");
  // Запоминаем наше новое сокращение
  await db.put(shortName, url);
  const response = {
    // Что мы хотим сделать в ответ на новое сообщение
    "method": "sendMessage",
    // Чем будем отвечать на новую пару сокращение - адрес переадресации
    "text": `Теперь ${url} доступно по короткой ссылке url.mydomain.com/${shortName}`,
    // Кому будем отвечать, тут может быть просто ADMIN (идентично нынешней реализации),
    // либо update.message.chat.id чтобы у администратора была возможность
    // использовать бота в групповых чатах
    "chat_id": update.message.from.id
  }

  return new Response(
    JSON.stringify(response),
    {
      status: 200,
      headers: new Headers({"Content-Type": "application/json"})
    }
  )
}
Again, in the debugger, we check how our code works:
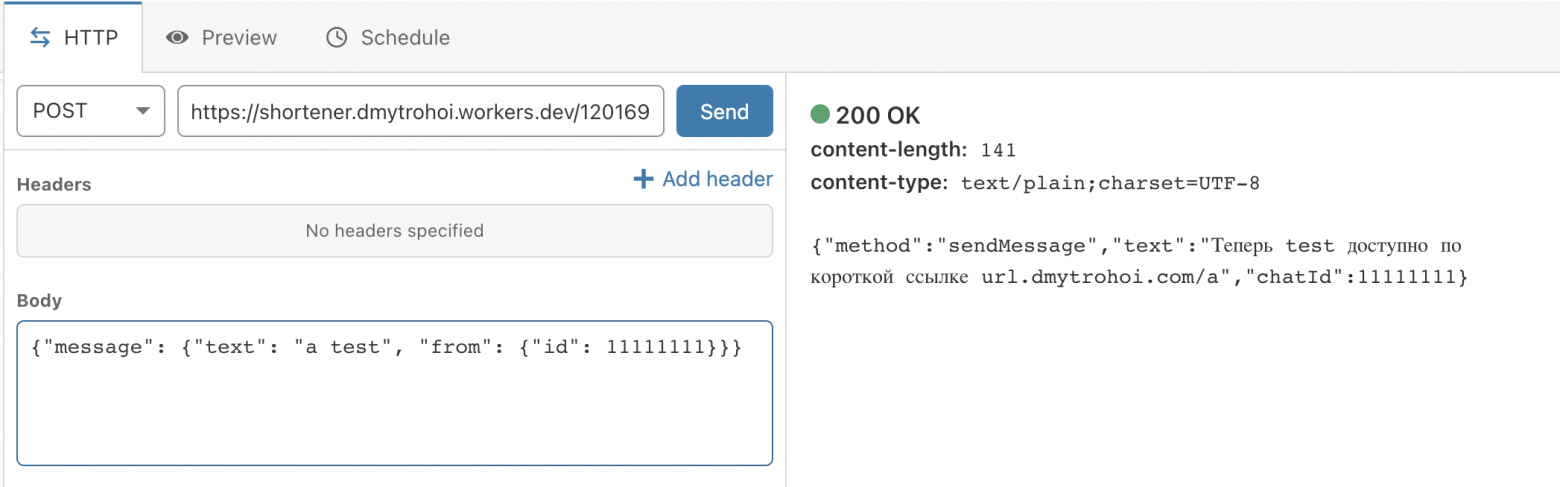
Looks functional
Let’s look in our database to make sure everything was saved. We can also remove our test values from the storage here:

It works
Only a small task remains: attach the Telegram Bot Webhook to our page. Everything is ready for that, so we will use a link in this format:
https://api.telegram.org/bot[BOT_TOKEN]/setWebhook?url=url.domain.com/[BOT_TOKEN]
The Telegram API’s response should be:
{"ok":true,"result":true,"description":"Webhook was set"}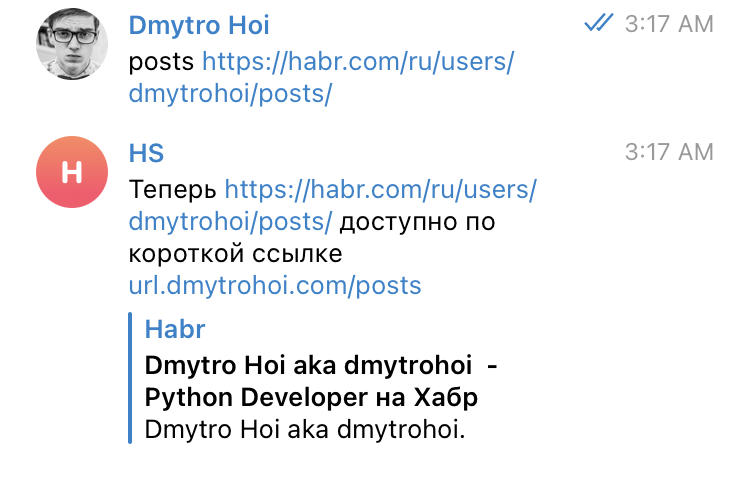
We check the bot’s result. Send it a short name and a link, as specified in the code, and try following the link to check that it works.
“It’s alive!”
Conclusion
In the end, we have a compact, easy-to-implement “URL shortener” that we can modify as we see fit.
It is worth noting that this approach has some limitations, which you can find on the Cloudflare Workers page. In brief:
-
we can write up to 1000 values to the database per day—the maximum possible number of short links created;
-
we can read from the database up to 100 000 times per day—the maximum number of visits;
-
the script itself can run up to 100 000 times per day—the number of messages to the bot and visits to shortened links;
-
the script must run no more than 1000 times per minute.
These limits should be enough for personal use. Share your thoughts about that in the comments.